

A 2022 American Society of Plastic Surgeons review of 3,400 fat grafting patients found that patients who prepared their recovery environment in advance reported 31% fewer complications tied to improper wound care. Your skin care routine after fat cell transfer surgery is not a minor detail , it directly determines how much of the transferred fat survives, integrates, and delivers the results you came for. This guide walks you through each phase of recovery, from the first 24 hours through week eight and beyond.
Before You Begin: What You’ll Need for Post-Op Skincare
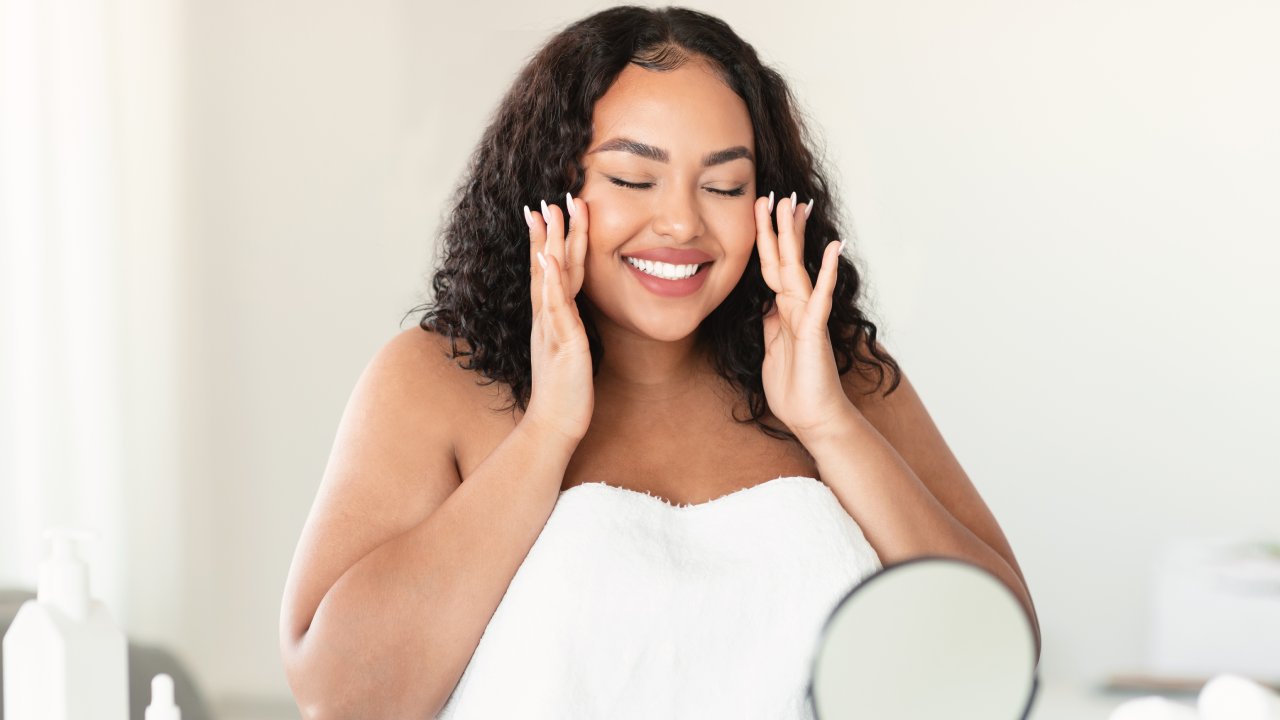
Before your procedure date, stock your bathroom with the products that belong in a post-fat-transfer routine. The list is short on purpose. A fragrance-free, pH-balanced cleanser , nothing foaming or exfoliating. A ceramide-based moisturizer. A mineral sunscreen rated SPF 30 or higher. Cool compresses or a clean, soft cloth for swelling management. That is the complete kit for the first four weeks.
Remove everything else from your counter: retinoids, AHA and BHA exfoliants, vitamin C serums, toners with alcohol, and any product with added fragrance or essential oils. Having them out of reach prevents the temptation to reach for them during a moment of habit.
Step 1: Protect the Surgical Sites on Day One
Day one is the most vulnerable window for graft survival. The transferred fat cells are establishing their new blood supply, and any disruption , pressure, friction, or topical product contact , reduces the percentage of cells that take. Handle both donor and recipient sites with the same level of care.
Follow Your Compression and Dressing Instructions
Your surgeon will have applied dressings to the donor site and given specific instructions about compression garments. Do not remove, adjust, or peek at these before your surgeon clears you. The compression maintains even pressure across the donor area, which reduces fluid accumulation and supports tissue healing. Adjusting dressings early does not speed recovery , it introduces contamination risk and disrupts the pressure gradient your surgeon designed.
Keep Skincare Completely Off the Treated Area
On day one, nothing goes on the recipient site. Not a gentle cleanser, not plain water, not moisturizer. The injection points are open microchannels, and introducing any product before the skin seals creates a direct infection pathway. On untreated skin , areas away from both donor and recipient sites , continue with a fragrance-free cleanser and ceramide moisturizer as normal.
Step 2: Cleanse Gently During the First Two Weeks
A 2021 Journal of Plastic and Reconstructive Surgery study of 520 facial fat transfer patients found that patients who used pH-balanced, fragrance-free cleansers in weeks one and two had significantly lower rates of contact dermatitis and graft disruption. The mechanism is straightforward: surfactants in foaming or exfoliating cleansers strip the acid mantle, triggering an inflammatory response that competes with the repair signals your grafted tissue needs.
How to Wash Without Disturbing Graft Sites
Use lukewarm water , not hot, which increases swelling, and not cold, which constricts the new capillaries forming around graft sites. Apply a small amount of fragrance-free cleanser to your fingertips and use the lightest possible contact around treated areas, without rubbing or pulling. Rinse by letting water run over the skin rather than splashing. Pat dry with a clean cloth using no pressure. Do not use a washcloth, loofah, or any textured material on or near the treated zones.
Step 3: Introduce Moisturizer at the Right Time
A 2020 Dermatologic Surgery study of 280 post-procedural patients found that ceramide-based moisturizers reduced transepidermal water loss by 42% during the first month of recovery. Reintroduce moisturizer only after your surgeon confirms that incision and injection sites are closed , typically between days three and seven depending on the treatment area. Apply it to the surrounding skin first, then cautiously extend to the treated area once cleared.
Understanding how the long-term condition of your skin affects your results helps frame why this step matters beyond immediate comfort: a well-hydrated barrier is the foundation for the collagen activity that will support your graft over months and years.
Ingredients to Use and Ingredients to Avoid
Ceramides and hyaluronic acid are the correct choices for this phase. Both support barrier repair without inflammatory activity. Ceramides replenish the lipid layer; hyaluronic acid draws moisture into the tissue without chemical activity. Everything else stays off the shelf for now. Retinoids increase cellular turnover, which disrupts graft integration. AHAs and BHAs exfoliate the surface and thin the barrier at exactly the time it needs to thicken. High-concentration vitamin C serums (above 10%) introduce acidity that irritates newly closed skin. These restrictions are not indefinite , they lift on a specific timeline in step five.
Step 4: Apply Sunscreen Before Any Sun Exposure
A 2023 Skin Cancer Foundation analysis of 1,800 post-surgical patients found that those who applied broad-spectrum SPF 30 or higher daily starting at week two had 58% lower rates of post-inflammatory hyperpigmentation at surgical sites. Healing skin produces melanin as a stress response to UV exposure. At incision and injection sites, that melanin deposits unevenly, leaving marks that can take months to fade. The window in which sun exposure does the most damage to grafting outcomes is weeks two through eight, when the skin is still actively remodeling.
How to Apply SPF Around Treated Areas
Use a mineral sunscreen only during the recovery period. Chemical sunscreens require absorption into the skin to function, which introduces unnecessary chemical activity at a sensitive site. Mineral formulas sit on the surface. Apply with a clean fingertip using a gentle pressing motion rather than rubbing. Avoid applying directly over any area that is still tender, swollen, or not yet fully closed. Reapply every two hours during outdoor exposure, including on overcast days.
Step 5: Reintroduce Active Ingredients on a Timeline
A 2022 study published in Aesthetic Surgery Journal tracking 410 fat grafting patients found that reintroducing retinoids before week eight consistently correlated with increased skin sensitivity and disrupted healing at graft sites. The phased return to a full routine is not overly cautious , it is based on the actual timeline of graft vascularization.
Weeks One Through Four: The Foundation Phase
The complete routine for this phase is three products: cleanser, ceramide moisturizer, SPF. No toners. No serums. No exfoliation of any kind. If your pre-procedure routine included a multi-step regimen, this simplicity can feel wrong. It is not. The skin is doing complex repair work underneath the surface, and adding actives interrupts it.
Weeks Five Through Eight: The Reintroduction Phase
Starting at week five , with your surgeon’s clearance , introduce one new product at a time. Patch-test on the inner arm for 48 hours before applying to the face or treated body area. If there is no redness, increased warmth, or breakout response, proceed. Wait five to seven days before adding the next product. This pace feels slow, but it protects the healing work already completed.
After Week Eight: Full Routine Restoration
Once your surgeon confirms graft integration is progressing well, return to your full regimen including any medical-grade products cleared for your skin type. At this stage, collagen-stimulating ingredients begin delivering compounding benefits , the graft has survived, and supporting the surrounding tissue with retinoids and vitamin C now works with your results rather than against them.
Step 6: Manage Swelling and Bruising Without Harsh Topicals
A 2021 Plastic and Reconstructive Surgery Global Open study of 640 patients found that consistent lymphatic drainage massage, started at week two with provider clearance, reduced visible swelling duration by an average of nine days. Elevation, cool compresses, and adequate hydration are the tools for managing swelling in the acute phase. Arnica gel applied to non-grafted skin is acceptable for bruising. Do not apply any topical that constricts circulation , including high-menthol products or vasoconstricting formulas , near recipient sites. Constriction reduces blood flow to an area that is actively building new vasculature.
Troubleshooting: Common Skincare Mistakes After Fat Transfer
The most common error is defaulting to a pre-surgery routine too soon. Familiar products feel safe, but your skin’s tolerance and the tissue’s needs have changed. The second most common mistake is applying too much pressure during cleansing , often because patients are used to massaging in their cleanser. At graft sites, massage-level pressure displaces tissue. The third is skipping SPF on cloudy days, which still deliver 80% of UV radiation.
Signs Your Skin Is Reacting Badly
Persistent redness that spreads or deepens after day three is a signal, not a normal part of healing. Increased warmth at the injection site, new breakouts directly over graft areas, or unusual firmness that develops rather than resolves , all of these indicate that a product is creating an inflammatory response at the graft site. Stop all new products immediately and contact your surgeon before reintroducing anything. Early intervention prevents minor reactions from affecting graft survival.
What to Try This Week
Go through every product on your bathroom shelf today. Anything containing retinoids, AHAs, BHAs, fragrances, or essential oils goes in a separate bag , out of reach but not thrown away. Replace that entire set with one ceramide moisturizer and one mineral SPF 30. That is the complete routine for week one. Protecting the foundation now is what makes the long-term quality of your results worth the investment you made.